Alternative Process Tutorials

Alternative Process Tutorial #8
Film Choices and Exposure
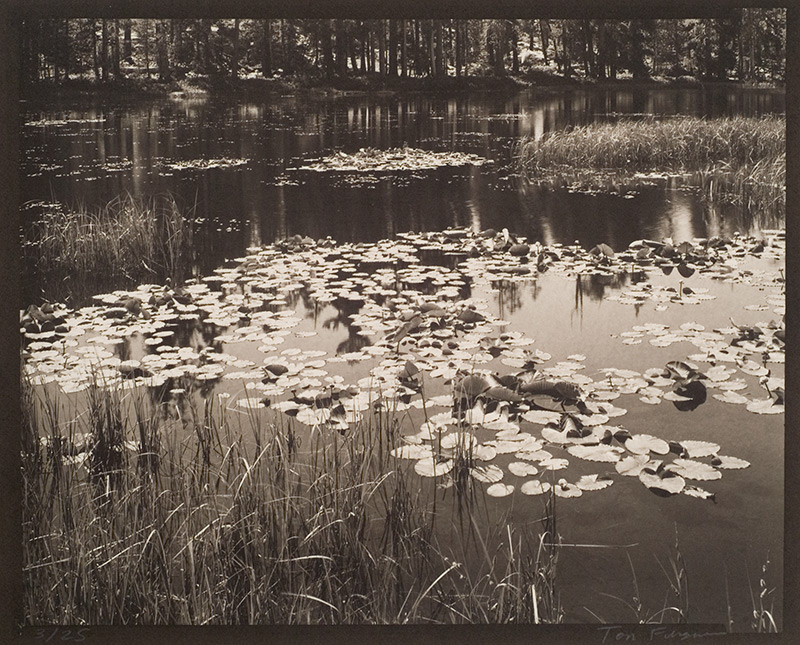
Illustration #75: Platinum Photograph
Copyright © 1991 by Tom Ferguson
Click on image for larger view
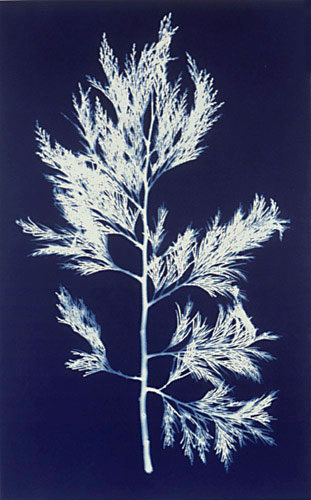
Illustration #76: Cyanotype Photogram
Copyright © 1992 by Tom Ferguson
Click on image for larger view
Most black and white negative films can be grouped as either "straight line" or "soft toe and shoulder" films. For alternative process work, most will want a "straight line" film.
Film is not a perfectly recorder of the light you expose it to. It is highly inaccurate in the very black tones (very clear film) and the very white tones (very opaque film). Compare exposing film to driving a heavily loaded 1972 VW Bug. It takes quite a bit of gas to get it moving (it takes quite a bit of light hitting the film before it will record anything, just because you double or half the amount of dim light hitting the film doesn't mean that a full stops difference will occur. You may get 1/2 a stop, you may get nothing!). Once the VW Bug is moving, a change in gas peddle pressure will equal a change in speed (this is like the middle section of the film's abilities, a one stop change in the light hitting it will cause a normal change in its opaqueness). Once your VW Bug is doing 65mph, depressing the gas peddle further isn't likely to increase your speed much (once a lot of light is hitting the film, a one stop increase in light may only result in a 1/2 or less its normal increase in its opaqueness). Yes, I did own a 1972 bug. During my younger years I was an avid mountain climber. That bug (slowly) crawled with me up many a mountain road.....
A "soft toe and shoulder" film such as Neopan 400 (see illustration #78) turns on very slowly. It has a large area (soft toe) where your "blacks" (clear film areas) are recorded "soft" (not at their full difference). This is followed by a small accurate middle section. Then finally, a large "soft" highlight area (soft shoulder) where your whites (opaque film areas) are not recorded at their full difference. This makes for a rather "forgiving" film. If you underexpose, you will probably land somewhere on the large "soft toe". While this will give poor separation, at least you will have some info on the film. If you Shoot a scene with too much contrast (too much difference between black and white, such as a night time scene with dark streets and bright street lights) the highlights will fall on the "soft shoulder" and will be easier to print than if they were recorded accurately. While these films can be convenient, they make poor alternative process films due to the large density ranges needed for most alt processes. These large density ranges push the highlights too far into the films "soft shoulder", often resulting in "mushy" highlights (not enough difference between the almost white print values).
A "straight line" film such as T-Max400 (see illustration #77) turns on very suddenly, then goes very quickly to a large accurate / linear area. This means that, properly exposed, these films have very good shadow value separation. It also means that underexposed film may have no shadow information recorded on it at all! The "large accurate area" will allow you to record the very large density ranges needed to create nicely separated highlight (white) print values in alternative processes.
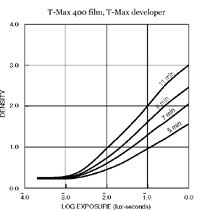
Illustration #77
T-Max 400 development Chart
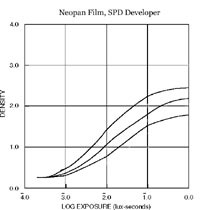
Illustration #78
Neopan development Chart
The first step in fine-tuning your materials is to determine your personal film speed (EI). In silver gelatin printing this is determined by the exposure needed to create 0.1 density units of difference between an unexposed and a zone 1 negative. This means that your zone 1 negative must be 1/3 stop darker than clear film. This is insufficient shadow separation for alternative processes.
To correct this problem you need a test target. Take your spot meter and visit an art store. Find a 32x40 inch gray mat board that is close to an 18% gray card. You will also need glue and two other sheets of gray mat board, one 1/3 to 1/2 stop lighter and another 1/3 to 1/2 stop darker. Glue an 8x32 inch piece of the lighter board on one end of the 18% board, and a 8x32 inch piece of the darker board on the other side (see illustration #79). In this tutorial we will only measure the center section of our target, in more advanced tutorials we will need all three tones.
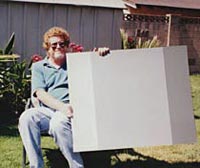
Illustration #79
Mat board test target
Illustration #80
Developed EI test
Set up this target in the type of light you normally use (daylight, tungsten, or flash), load your chosen film into your favorite camera, then put it in front of the target. Focus on infinity, then fill the viewfinder with the mat board. The mat board will be out of focus. Set your meter to the manufacturer's rating (use 400 for T-Max 400), then meter the center of the mat board and arrange your lights so that meter readings on all 4 corners of the center section are equal. Set your camera to 5 stops less exposure than indicated by your meter, and expose your first image. This is your minimum exposure test, and will be very thinly exposed. This is different than silver gelatin zone systems that use unexposed film. Because alternative processes require a negative with more exposure (and often more development) than silver gelatin, it's unlikely you will ever see an area of unexposed film in your negatives.
Next, open up your aperture two stops and expose another image. Continue by increasing the exposure 1/3 stop for the next 5 exposures. These are your zone 2 tests at various personal EI settings. Typically zone 1 is used in determining silver gelatin EI. Zone 1 is the threshold of tone, but holds no detail. Zone 2, however, is the threshold of detail; a better standard for an alternative processes.
When doing any film tests it is important to keep your shutter speed at 1/2 second or faster. This will keep reciprocity failure from confusing your results. Also, whenever possible, do the entire test using only one shutter speed. Shutter speeds are typically less accurate than aperture settings.
Develop the negatives in accordance with the manufacturer's recommendation plus 25% extra time in your favorite developer. As an example, Kodak says 6 minutes for T-Max 400 in HC-110, so develop for 7-1/2 minutes. If you are using a pro lab to develop film, instruct them to develop all sheets for "push 1/2 stop".
Once the negatives are completely dry arrange them from thinnest to densest. They should look like illustration #80. Lay a Kodak ND.3 gel filter over the thinnest (minimum exposure) negative, and put both on your light source. Assemble your spot meter and close-up filters. Aim the meter at this negative and filter, then move in and out until the meter is focused. Write down the reading. Next, measure the remaining zone 2 negatives (without your ND .3 gel) starting with the thinnest. Find the negative that matches or is slightly denser than your "minimum exposure negative and filter" reading. If this is the thinnest remaining negative, your personal EI is equal to the manufacturer's rating (400 for T-Max 400). Decrease your EI 1/3 stop for every remaining negative until you find a match (320, 250, 200, 160, and 125 for TMax 400). Write your personal EI down. This is your new ASA setting for alternative process photography with this film. This number will typically be 1/3 to 2/3 of a stop slower than a personal silver gelatin EI. Also find the step on your step wedge that matches your correct zone 2 negative. Write this step number down, it is your personal "zone 2 target". It will be used in further tutorials.
Also write directly on each negative indicating it's speed value. These aren't "important negs", just write with a sharpie in a corner of the neg. Put your initials on the test that indicated your personal film Exposure Index (EI). Save all of these tests for further use.
What the alternative process photographer needs is a film that is available in large enough sizes to make an effective contact print, and that will hold good separation in what the silver gelatin printer would call zones 8 through 11. This separation is often unwanted by silver gelatin printers, who complain about "out of control hot spots". This being said, is it any surprise that my favorite film for most alternative processes is Kodak's T-Max 400? Much has been written about controlling highlights in this film. I suggest we use its special properties to our advantage. Unfortunately Kodak doesn't produce this film in sizes larger than 8x10. Another good choice is Ilford's HP-5 Plus. Its highlight separation isn't quite as good as T-Max 400's, but it is available in sizes up to 12x20 (including 4x5, 8x10 and 11x14). While both of these films react well to many different developers, Kodak's HC-110 has proven versatile enough to provide the range of contrasts needed for alternative process work.
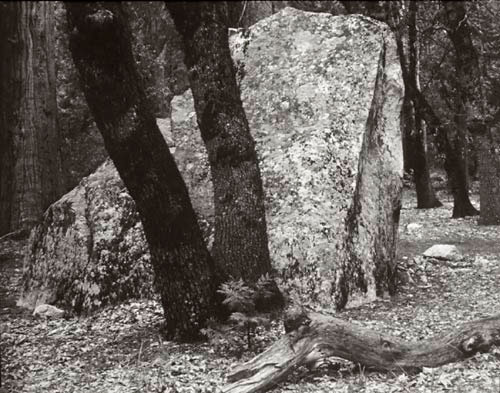
Illustration #81
Image Shoot with an appropriate film EI
Copyright © 1991 by Tom Ferguson

Illustration #82
Image Shoot at manufacturers rating
Note poor shadow separation
Copyright © 1991 by Tom Ferguson
Click the "next" link below and we will determine the optimal personal development time for your film.